Make Timer function in python

시간 측정 decorator 함수 만들기


import time

1
import time

실행 시간을 확인 하는 함수 만들기

1
2
3
4
5
6
7
8
9
10
11
12
13
14
15
16
17
def timer(func):
""" 함수 실행 시간 확인
:param func: check할 함수 넣을거임
:return: 걸린 시간
"""
def wrapper(*args, **kwargs):
#현재 시간
time_start = time.time()

#decorated function 불러오기
result = func(*args, **kwargs)
time_total = time.time() - time_start
#
print("{}, Total time is {: .2f} sec.".format(func.__name__, time_total))

return result
return wrapper
  • 가변 매개 변수 args(*)

    • 함수를 정의할때 앞에 *가 붙어 있으면, 정해지지 않은 수의 매개변수를 받겠다는 의미
    • 가변 매개변수는 입력 받은 인수를 튜플형식으로 packing 한다.
    • 일반적으로 *args (arguments의 약자로 관례적으로 사용) 를 사용한다.
    • 다른 매개 변수와 혼용가능
  • 키워드 매개변수 kwargs(**)

    • 함수에서 정의되지 않은 매개변수를 받을 때 사용되며, 딕셔너리 형식으로 전달.
    • 일반 매개변수, 가변 매개변수와 함께 일는 경우 순서를 지켜야함 (일반>가변>키워드 순)
    • **kwargs (Keyword arguments의 약자로 관례적으로 사용 )


decorator 함수를 이용하여 시간 확인 함수 설정, 실행

1
2
3
4
5
6
7
8

@timer
def check_time(num):
time.sleep(num)

if __name__ == "__main__":
check_time(1.5)

out

check_time, Total time is 1.50 sec.


관련 이론들을 아래에 적어 놓았다.

  • timestamp :python에서 time은 1970년 1월 1일 0시 0분 0초를 기준으로 경과한 시간을 나타냄
  • time_struct class
    • timestamp가 주어 졌을때 날짜와 시간을 알아내기 위한 API 제공
name value Ex.
tm_year year 1993, 2021
tm_mon month 1~12
tm_mday day 1~31
tm_hour hour 0~23
tm_min minute 0~59
tm_sec second 0~61
tm_wday 요일 0~6 (0 : MON)
tm_yday 연중 경과일 1~366
tm_isdst summertime 0: unapply 1: apply


time() 함수


  • 현재 timestamp 얻기

in

1
2
3
secs = time.time()
print(secs)

out

1638870356.8049076

  • unix timestamp는 소수로 값을 return, 정수 부분이 초 단위.

부가적인 time 함수들

  1. gmtime() : GMT 기준의 time_struct type으로 변환

    in

    1
    2
    tm = time.gmtime(secs)
    print(tm)

    out

    time.struct_time(tm_year=2021, tm_mon=12, tm_mday=7, tm_hour=9, tm_min=53, tm_sec=5, tm_wday=1, tm_yday=341, tm_isdst=0)

  1. localtime() : 현지 시간대 기준의 time_struct type으로 변환

    in

    1
    2
    3
    4
    5
    6
    7
    tm = time.localtime(secs)
    print("year:", tm.tm_year)
    print("month:", tm.tm_mon)
    print("day:", tm.tm_mday)
    print("hour:", tm.tm_hour)
    print("minute:", tm.tm_min)
    print("second:", tm.tm_sec)

    out

    year: 2021
    month: 12
    day: 7
    hour: 18
    minute: 53
    second: 5

  2. ctime() : 요일 월 일 시:분:초 연도 형식으로 출력

    in

    1
    string = time.ctime(secs)

    out

    Tue Dec 7 18:56:03 2021

  1. strftime() : strftime 과 같은 특정 형식으로 변환가능
    • parameter로 time_struct type data를 받기 때문에 위의 함수들을 사용해서 data를 strftime()으로 넘겨야 함.

      in

      1
      2
      3
      tmt = time.localtime(secs)
      string = time.strftime('%Y-%m-%d %I:%M:%S %p', tmt)
      print(string)

      out

      2021-12-07 07:00:54 PM

인자를 쓰는동안 secs로 계속 썻더니 시간이 계속 올라가고있다 하하하 ^0^

  1. strptime() : strftime
    과 같은 특정 포멧의 시간을 time_struct type 으로 변경.

    in

    1
    2
    3
    string = '2021-12-07 07:00:54 PM'
    tmm = time.strptime(string, '%Y-%m-%d %I:%M:%S %p')
    print(tmm)

    out

    time.struct_time(tm_year=2021, tm_mon=12, tm_mday=7, tm_hour=19, tm_min=0,
    tm_sec=54, tm_wday=1, tm_yday=341, tm_isdst=-1)

  2. sleep() : 일정 시간 동안 시간 지연 시키기

    in

    1
    2
    3
    print("Start-->")
    time.sleep(1.5)
    print("<--End")

    out

    Start–>
    <–End

  • time.sleep(sec) : 초 단위로 시간을 지연 시킨다.
Python 함수 실행하기

day 1 Lecture (02)

  • 사용자 함수 만들고 실행 하기


personal function 만들기

  • python에서 함수 만들기

사용자 정의 함수

<형식>

1
2
3
4
5
def func_name(parameter):
# ...
# do something codes
# ...
return parameter

사용자가 직접 만들어 사용하는 함술로 매개변수 (parameter: 함수에 입력으로 전달 된 값을 받는 변수)와
인자(argument: 함수를 호출 할 때 전달 하는 입력값)이 있다.

1
2
3
4
5
6
7
#/c/Users/brill/Desktop/PyThon_Function/venv/Scripts/python
# -*- coding : utf-8 -*-

def cnt_letter():
"""안에 있는 문자를 세는 함수입니다. """ # 함수를 설명 하는 문구
print("hi")
return None
  • python 문서를 만들때 어떤 위치 (directory)에서 작업 했는지 제일 위에 써 줘야 한다.
  • 또한 cording을 어떤 언어로 했는지 확인 해 줘야 한다. (한글 : UTF-8)
  • def : definition 함수를 정의한다. 뒤에 cnt_letter라는 함수 이름을 써준다.
  • def cnt_letter(): ()안에 args를 넣어 주면 된다.
  • Doc : “”” 여기 “”” 여기 안에 이 함수가 어떤 함수인지 설명을 써 주어야 한다.
    • 혼자 일 하는 것이 아니기 때문에 함수를 공통적으로 사용 하기때문.
  • print : print
  • return : return None


함수 실행하기

1
2
3
4
if __name__ == "__main__":
print(cnt_letter())
print(help(cnt_letter()))
"""도움말 : 어떤 함수인지 확인 할 수 있다. """
  • 함수를 실행한다.

  • name 은 글로벌 변수로 보통 __main__으로 할당된다.

  • import 할 때와 구별 하려고 사용한다고 하는데 잘 모르겠다. (외워)

  • cnt_letter() 함수를 print 한다.

  • help 함수는 python 내장 함수인데,

class NoneType(object)

| Methods defined here:

|

| bool(self, /)

| self != 0

|

| repr(self, /)

| Return repr(self).

|

| ———————————————————–

| Static methods defined here:

|

| new(*args, **kwargs) from builtins.type

| Create and return a new object. See help(type) for accurate signature.

None

실행창에 위와 같은 도움을 준다.

실행이 성공하면 아래와 같은 결과값이 나온다.

Process finished with exit code 0

오늘 들은 강의보다 100배 나은 tistory가 있어서 공유 해본다. .. 아… 내 인생

사용자 정의 함수

name & namespace

Name

  • name : identifier, variable, reference
  • object의 구분을 위해 사용

object

  • object는 value, type, 주소 의 3원소를 가지고 있다.

Ex)

1
2
3
4
5
a = 10
b = 0.12

print(a + b)

Memory에 저장된 형태

object(10, int, ref_cnt=1)0x100

= 100번째 저장된(주소) object는 10(value), int(type)의 속성을 갖는다.

** 하나의 object는 여러개의 이름(name or ref.)를 가질 수 있다.

** ref_cnt는 reference count를 의미한다.

name binding

- assignment
- import
- class 정의
- function 정의 ...

assignment

  • dictionary (key : value)
  • name binding (name : address)

객체(object)에 이름과 주소를 할당

이름 작성 규칙

  • 하나의 단어로 작성, 문자(한글), 숫자, _ 가능(띄워쓰기 불가능)
  • Keyword(+ 다른곳의 함수 이름)은 안쓰는 것이 좋고 쓰지만자
  • 숫자로 시작할 수 없으며, 대소문자 구분가능
  • _로 시작하는 이름은 class에서 쓰이므로 지양

name space

  • namespace는 이름 관리를 위한 dict container이다.
  • 모든 class, instance, fuction은 자신의 namespace를 가지고 있다.

built-in namespace

python에서 제공하는 함수, class, instance 등이 들어있는 곳.

Built-in Functions

global name space

내가 만든 함수, 인수, class들이 들어 있는 곳

1
2
3
4
5
a = 100
b = a
c = a
a = 101
print(a, b, c)

◎ namespace (global)

a : 0x100
b : 0x100
c : 0x100

◎ in memory

object(100, int ref_cnt=3) 0x100
object(101, int ref_cnt=1) 0x200

  • 그렇다면, 왜 ref_cnt 를 하는 것일까 ??
    • 사용되지 않는 객체를 삭제 하기 위해
    • 하나의 객체가 여러개의 이름을 가질 수있다.
    • 하지만, 하나의 이름은 하나의 객체만 가질 수 있다.

In

1
2
3
4
5
6
7
8
9
10
11
import sys

a= "Python"
b= a
c= a
a= "python"
print(f'a=[a], b=[b], c=[c]')

sys.getrefcount(a)
sys.getrefcount(b)
sys.getrefcount(c)

Out

a=[a], b=[b], c=[c]

4

5

5

키워드

pprint 안의 함수 pprint를 사용하여 키워드 리스트를 출력해 본다.

in

1
2
3
4
import keyword
import pprint as pp

pp.pprint(keyword.kwlist)

out

[‘False’,
‘None’,
‘True’,
‘_peg_parser_‘,
‘and’,
‘as’,
‘assert’,
‘async’,
‘await’,
‘break’,
‘class’,
‘continue’,
‘def’,
‘del’,
‘elif’,
‘else’,
‘except’,
‘finally’,
‘for’,
‘from’,
‘global’,
‘if’,
‘import’,
‘in’,
‘is’,
‘lambda’,
‘nonlocal’,
‘not’,
‘or’,
‘pass’,
‘raise’,
‘return’,
‘try’,
‘while’,
‘with’,
‘yield’]

assignment

  • assignment는 Expression이 아닌 statment이다.

    • Expression은 한개의 객체로 Evaluate될 수 있는것
    • 이름에 binding할 수 있다. (syntax에서 사용 할 수 있는 위치가 다르기 때문)
    • ver 3.8~ assignment expression (:=)이 추가되어 제공
  • assignment의 종류

    종류 기호 ex exp
    assignment = a = 10 10에 a 를 바인딩
    assignmented assignment **=, +=, -=, *=, //=, %=. <<=, >>=, &=, |=, ^=, @= a+= 10 a에 10을 더한 결과 객체에 a를 바인딩

덧셈의 ref_cnt

1
2
3
4
5
6
print("**********")
i = 10
print(id(i))
i += 1
print(id(i))
print("**********")

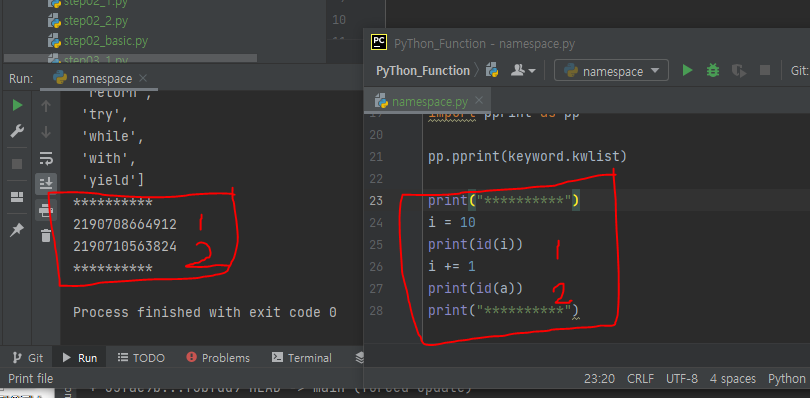
i가 10이때, i += 1 을 하면 11이라는 것이 만들어 진다.

이 11은 새로운 객체이다.

assignment_i

새로운 객체가 생성 되기 때문에 id가 달라진다. (memory의 adress)

pack & unPack

  • pack : (,) 콤마를 이용하여 Tuple 객체 하나 생성
  • unpack : 1개의 묶음에 있는 여러개의 객체 아이템이 분리되어 각각의 이름에 바인딩 됨.

이와 같은 pack과 unpack을 이용 하면, 여러 이름에 여러 값을 부여하기 쉽다.

in

1
2
3
4
5
6
7
8
9
10
11
12
13
14
15
data_int = 1
data_Tuple = 1,

data = 10, 20, 30
first, second, third = data
print(first, second, third)

def function():
a = 10
b = 20
print(locals())
del b
print(locals())

function()

Out

10 20 30


{‘a’: 10, ‘b’: 20}

{‘a’: 10}

  • del (변수) : python에 있는 좋은 기능
  • 변수를 삭제 할 수 있다.
  • locals() : local안에 있는 변수를 확인 할 수 있다.
  • type() : 변수의 data type을 확인 할 수 있다.

Ref. youtube, 1hr

Python Class and function

day 1 Lecture (01)


1. 새로운 Project 시작

  • python project를 새로 시작 해 보자.

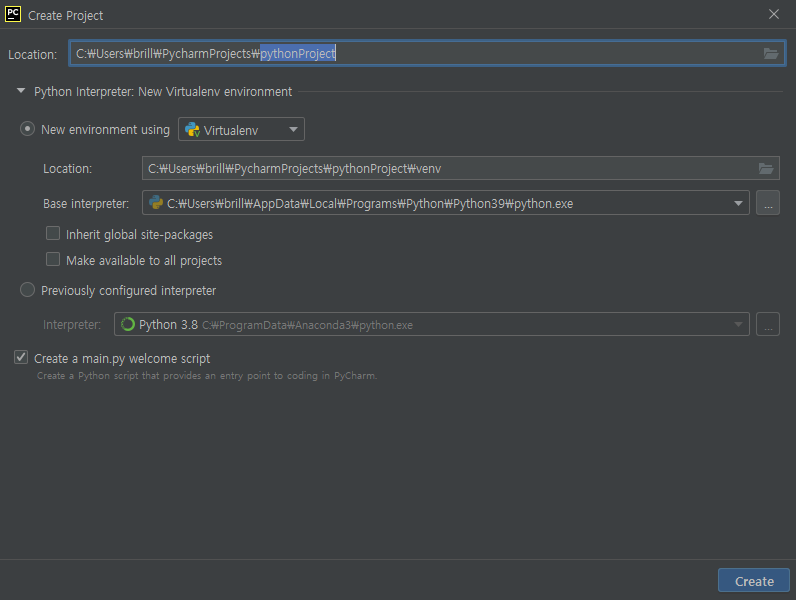
create_NewProject


create_NewProject_file

pycham을 실행하여 project file을 만들어도 되지만, 원하는 directory에 file 을 만들고, 그 file에서 pycharm을 실행 해도 된다.

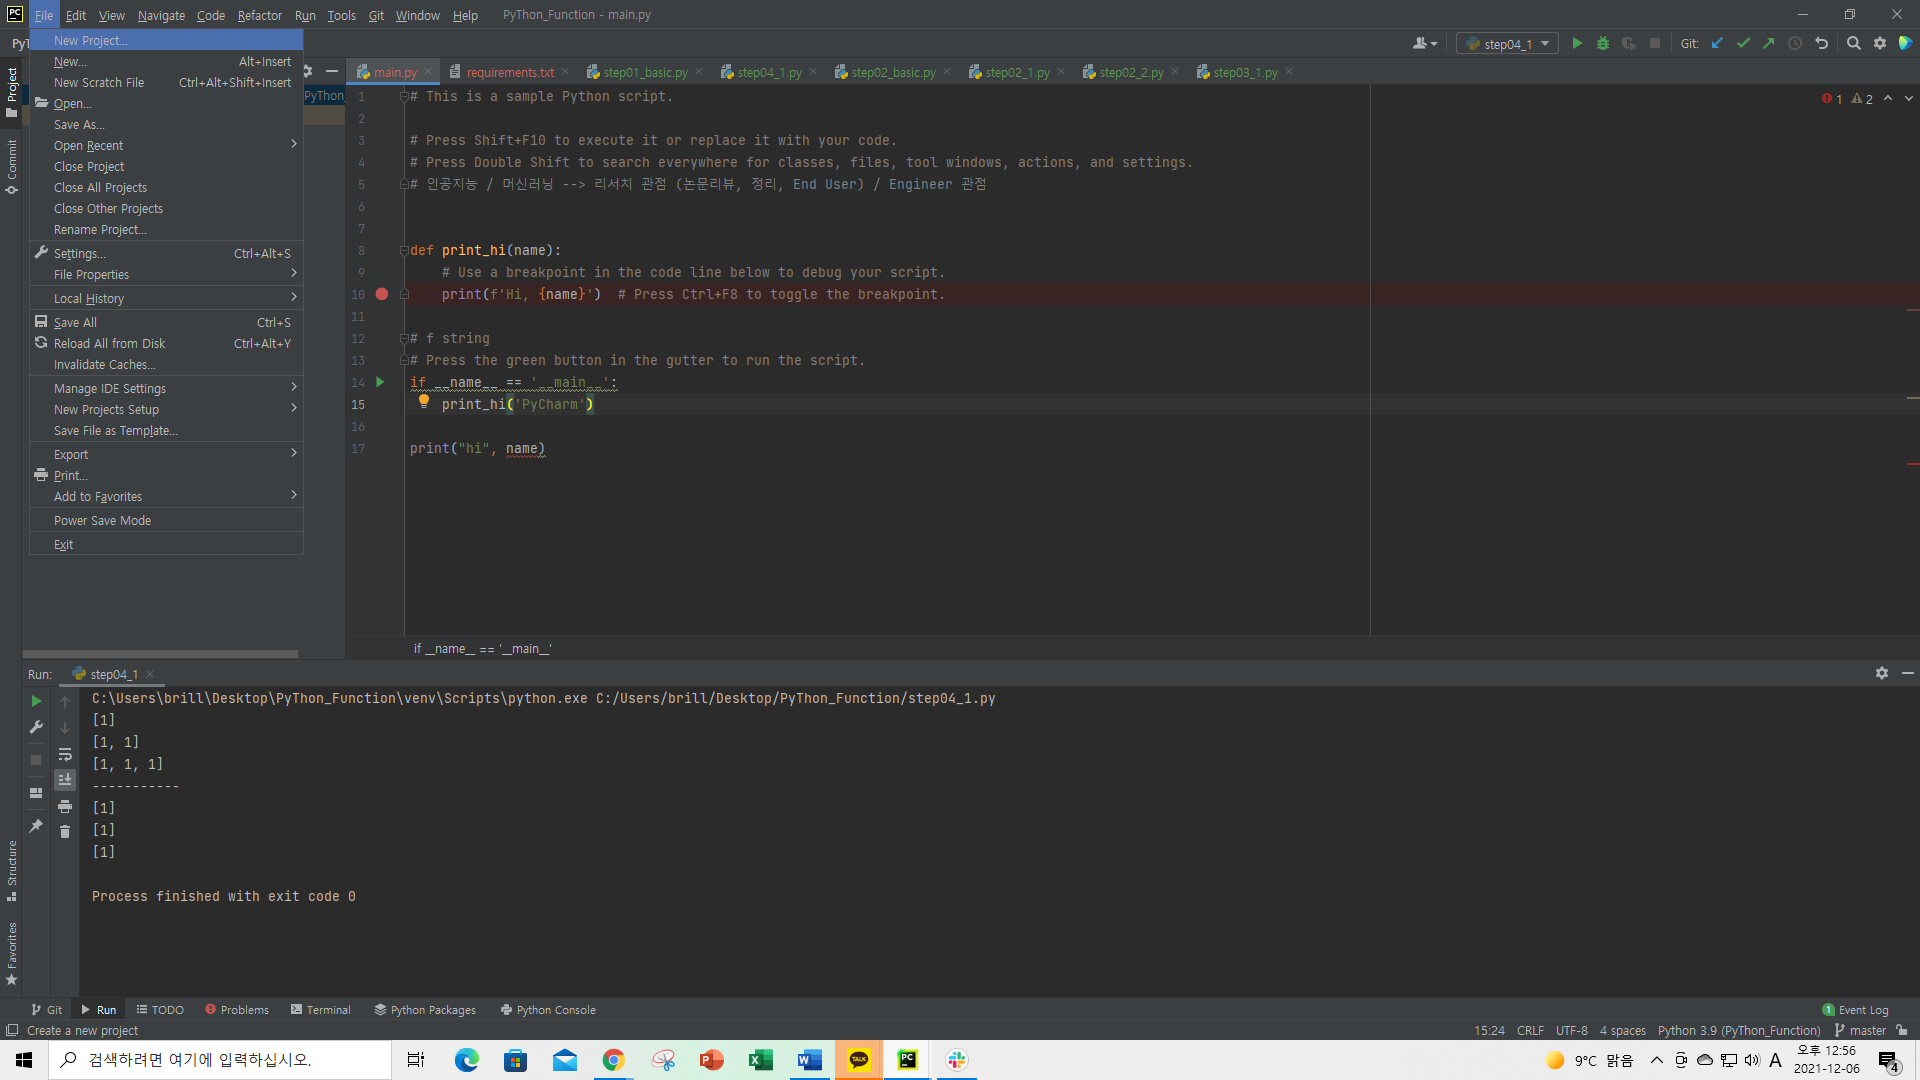
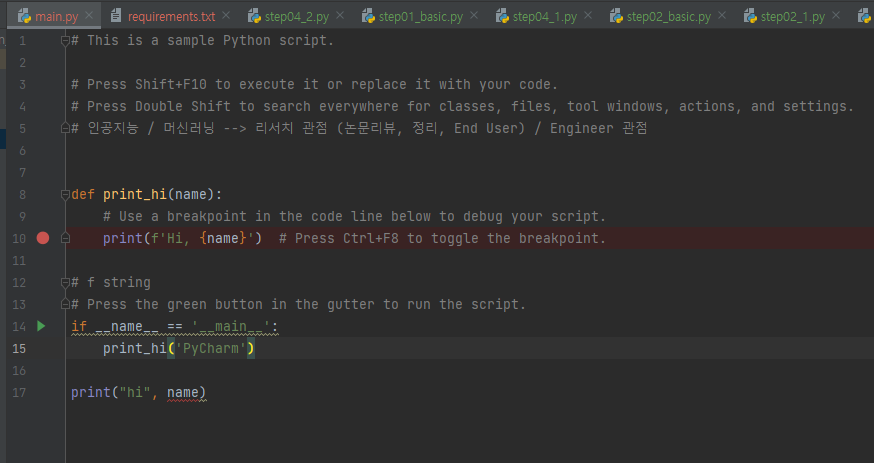
2. main.py :

stop point

main.py

1
2
3
4
5
6
7
8
9
10
11
12
13
# This is a sample Python script.
# Press Shift+F10 to execute it or replace it with your code.
# Press Double Shift to search everywhere for classes, files, tool windows, actions, and settings.
# 인공지능 / 머신러닝 --> 리서치 관점 (논문리뷰, 정리, End User) / Engineer 관점


def print_hi(name):
# Use a breakpoint in the code line below to debug your script.
print(f'Hi, {name}') # Press Ctrl+F8 to toggle the breakpoint.

# f string
# Press the green button in the gutter to run the script.

def name(name): 함수 정의 하기

1
2
3
4
5
6
7
def print_hi(name):
print(f'Hi, {name}')

if __name__ == '__main__':
print_hi('PyCharm')

print("hi", name)
  • Ctrl + shift + F10 : Run
  • def 로 함수 정의 이름(print_hi), 인수(name)을 설정 :

    • 원하는 동작(print(f’Hi, {name})) 넣기
  • 함수 실행 : 왜 이렇게 해야 하는가를 공부 해 오자.

    • if name == ‘main‘:
      print_hi(‘PyCharm’)
  • print(“hi”, print_hi(‘YH’))

Hi, PyCharm

Hi, YH

hi None

3. Import.

1
2
3
4
5
6
numpy == 1.21.4
pandas ==1.3.4
seaborn==0.11.2
matplotlib==3.5.0
scipy ==1.7.3
scikit-learn == 1.0.1

가상환경 설정을 하는 이유

Python PKG : 20~30 만개 있다.

  • 라이브러리 : 종속성이 있다.
  • 범용성이 좋아서 data analysis, web site development, 앱, 게임 등 개발, GUI, 개발 그 외 여러가지 가능
  • Matplotlib (기초가 되는 라이브러리, 3.5.0)를 참조하여 seaborn, plotly, …
  • 버전 관리 불가.
  • data 분석을 위한 가상 환경
    같은 Local machine 위에
    Game 개발을 위한 가상 환경 조성 (다른 버전을 사용 할 수 있다. )

PKG 설정:

https://pypi.org 에 들어가서 PKG 버전을보고 설치 하면 된다.

4. venu : 가상 환경 설정

venv_En

1
2
3
4
5
6
7
8
9
10
11

#terminal

$ source ./venv/Scripts/activate
(venv)

#terminal
$ which python
/c/Users/brill/Desktop/PyThon_Function/venv/Scripts/python
(venv)

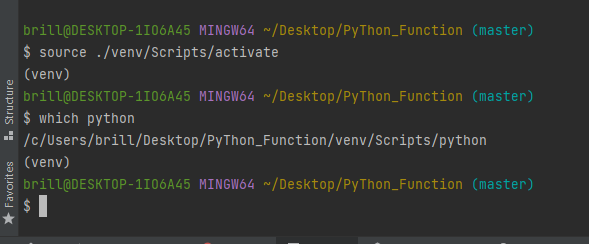
가상환경 설정

  • $ which python
    /c/ProgramData/Anaconda3/python

  • $ source ./venv/Scripts/activate

    (venv)

  • $ which python

/c/Users/brill/Desktop/PyThon_Function/venv/Scripts/python

(venv)

(venv)

가 있어야 가상환경 설정이 된것이다.

raise_ValueError

terminal에서 pandas import 하는 방법

1
2
brill@DESKTOP-1IO6A45 MINGW64 ~/Desktop/PyThon_Function (master)
$ pip install pandas

Requirement already satisfied: pandas in c:\users\brill\desktop\python_function\venv\lib\site-packages (1
.3.4)
Requirement already satisfied: pytz>=2017.3 in c:\users\brill\desktop\python_function\venv\lib\site-packa
ges (from pandas) (2021.3)
Requirement already satisfied: numpy>=1.17.3 in c:\users\brill\desktop\python_function\venv\lib\site-pack
ages (from pandas) (1.21.4)
Requirement already satisfied: python-dateutil>=2.7.3 in c:\users\brill\desktop\python_function\venv\lib
site-packages (from pandas) (2.8.2)
Requirement already satisfied: six>=1.5 in c:\users\brill\desktop\python_function\venv\lib\site-packages
(from python-dateutil>=2.7.3->pandas) (1.16.0)
WARNING: You are using pip version 21.1.2; however, version 21.3.1 is available.
You should consider upgrading via the ‘C:\Users\brill\Desktop\PyThon_Function\venv\Scripts\python.exe -m pip install –upgrade pip’ c
ommand.
(venv)

pandas 등을 하나씩 install 하는 방법도 있지만, file(requirements)
를 만들어 install 하는 방법도 있다.

1
2
3
4
5
6
7
8
9
10
11
12
13
14
15
16
17
18
19
20
21
# /c/Users/brill/Desktop/PyThon_Function/venv/Scripts/python
# -*- coding : utf-8 -*-

"""
모방 : 부모 클래스를 모방 후 자식이 창조
"""

import pandas as pd

class newDataFrame(pd.dataFrame):
pass

temp_dic = {"A": [1, 2, 3],
"B":[4, 5, 6]}

if __name__ == "__main__":
temp = pd.DataFrame(temp_dic, columns=["A","B"])
print(temp)
print("-----------------")
temp2 = newDataFrame(temp_dic, columns=["B", "A"])
print(temp2)